


Today we will discuss about creating a component plugin for Appian. There are many types of plugins we can create for Appian with the support of SDK and suite API. Today we will look into an example of creating a component plugin with JavaScript API in Appian.
If you are new to react you can create a react application by following the steps in react documentation following the steps using create an app in react. Verify the application by running the command it will start the application and serve it in the browser.
npm start
Then update the App.js with the logic corresponding to your component and once you have completed the component logic verify the development build after verification can bundle the application. We can use esbuild or any other bundlers for creating the bundle after updating the package.json with the following configurations.
  {
  "name": "ComponentPlugin",
  "version": "0.1.0",
  "private": true,
  "dependencies": {
    "@testing-library/jest-dom": "^5.17.0",
    "@testing-library/react": "^13.4.0",
    "react": "^18.2.0",
    "react-dom": "^18.2.0",
    "react-scripts": "5.0.1",
    "web-vitals": "^2.1.4"
  },
  "scripts": {
    "start": "serve public",
    "build": "esbuild src/index.js --bundle --outfile=public/ganttChart.js --loader:.js=jsx --format=cjs",
    "test": "react-scripts test",
    "eject": "react-scripts eject"
  },
  "eslintConfig": {
    "extends": [
      "react-app",
      "react-app/jest"
    ]
  },
  "browserslist": {
    "production": [
      ">0.2%",
      "not dead",
      "not op_mini all"
    ],
    "development": [
      "last 1 chrome version",
      "last 1 firefox version",
      "last 1 safari version"
    ]
  },
  "devDependencies": {
    "esbuild": "^0.19.11",
    "eslint-config-react-app": "^7.0.1",
    "serve": "^14.2.1"
  }
}
Then build the project with below command.
npm run build
If you have any parameters which should be passed from SAIL Interface you can use the event listener , the handleNewValue function should include the logics corresponding to any state updates using the parameters from SAIL component.
  const handleNewValue = (newTask) => {
    try {
      const tasksWithDateObjects = newTask.tasks.map(task => ({
        ...task,
        start: new Date(task.start),
        end: new Date(task.end),
      }));
      setTasks(tasksWithDateObjects);
    } catch (error) {
      console.error('Error parsing JSON file:', error);
    }
  };
  // Attach the event handler to Appian.Component.onNewValue
  useEffect(() => {
    Appian.Component.onNewValue(handleNewValue);
  }, []); // Empty dependency array to ensure the effect runs only once on mount
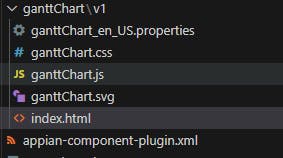
Although the component won't serve locally it will be served after deployment as JavaScript API will be available in Appian environment. Then Create a folder containing the bundled JavaScript and CSS files and other files required as shown below . These are example files which are included for the GanttChart component Plugin.
The following is an example properties file .
name=Gantt Chart
description=Gantt Chart for Tasks.
parameter.tasks.description=Tasks in Gantt Chart
Also update the index.html
<!DOCTYPE html>
<html>

<head>
  <link rel='stylesheet' href='./ganttChart.css' />
</head>

<body>
  <div id="root"></div>
  <script src='APPIAN_JS_SDK_URI'></script>
  <script src='./ganttChart.js'></script>
</body>

</html>
The appian-component-plugin.xml will contain the following details.
<?xml version="1.0" encoding="UTF-8"?>
<appian-component-plugin name="ganttChart" key="com.org.chart.ganttChart">
  <plugin-info>
    <description>Detects text in user supplied images</description>
    <vendor name="Appian" url="http://www.appian.com" />
    <version>1.0.0</version>
    <support supported="true" email="support@appian.com" url="https://community.appian.com"/>
  </plugin-info>

  <!-- Add a new component with every version you create -->
  <!-- This v1.0.0 component maps to the v1 folder -->
  <component rule-name="ganttChart" key="chart.ganttChart.component" version="1.0.0">
    <supported-user-agents>chrome</supported-user-agents>
    <icon-file>ganttChart.svg</icon-file>
    <parameter>
      <name>tasks</name>
      <category>input-only</category>
    <type>Dictionary?list</type>
  </parameter>
    <html-entry-point>index.html</html-entry-point>
    <sdk-version>2.0.0</sdk-version>
  </component>
</appian-component-plugin>
Then zip the plugin and deploy it in Appian environment plugins directory of the development server. Now you will be able to verify the logs for proper installation and you can access it from the component palette in Appian interface. Submit the component after the testing for approval process and if its approved your plugin will be listed as an Appian plugin which can be installed by Appian admins.
In addition format your source code using prettier and check whether there is an unused dependency using depcheck.
npm install -g depcheck
npx depcheck
npm uninstall <package-name>
Hope this will provide an insight on how we can do an end to end development of Appian Component Plugin.
Cheers!!! And Keep Coding!.